The Rustic Roots Farm Guide to Growing Hardneck Garlic
October 6, 2025
Planting garlic is one of our favorite fall traditions at Rustic Roots Farm. In this guide, we’re sharing expert advice about how we plant and grow hardneck garlic—from prepping the soil and spacing cloves to cutting scapes and curing bulbs for long-lasting flavor.
If there’s one crop we look forward to every fall, it’s garlic. Planting time feels like the calm after the harvest rush — a slower rhythm, cool air, and the satisfaction of knowing next year’s crop is already underway.
Garlic is one of those crops that rewards patience and care. You tuck it into the soil in fall, forget about it over winter, and months later you pull up beautiful bulbs full of flavor. Here’s how we grow premium hardneck garlic at Rustic Roots Farm — the kind best suited to cold winters and bold taste.
Why We Plant in Fall
Hardneck garlic needs a good stretch of cold to grow properly. That chilling period, called vernalization, is what helps form nice big bulbs.
Plant about six weeks before the ground freezes in your area — enough time for the cloves to set roots before winter, but not enough time to sprout above the soil. (If you garden in a milder climate, just aim for when the soil has cooled or you can pre-chill your garlic seed in the refrigerator.)
Once planted and mulched, garlic rests all winter and then bursts to life with the first signs of spring.
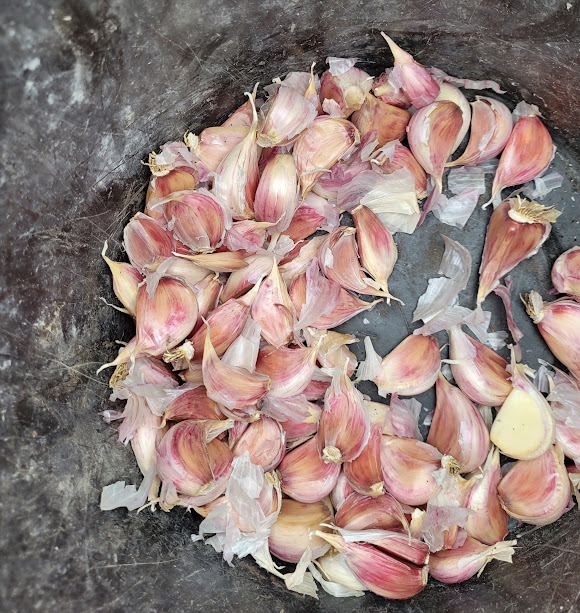
Step 1: Prep and Pop Those Cloves
A day or two before planting, separate the cloves from each bulb — try to leave the papery skins on to protect them.
We like to do this the night before planting with a good cup of coffee (or something stronger) and a little music. It’s simple, satisfying work.
Choose healthy, large, firm cloves — those will give you your best bulbs next summer.
Prepare your soil so it’s loose, well-drained, and rich in organic matter. Garlic doesn’t like soggy soil, so good drainage is key.
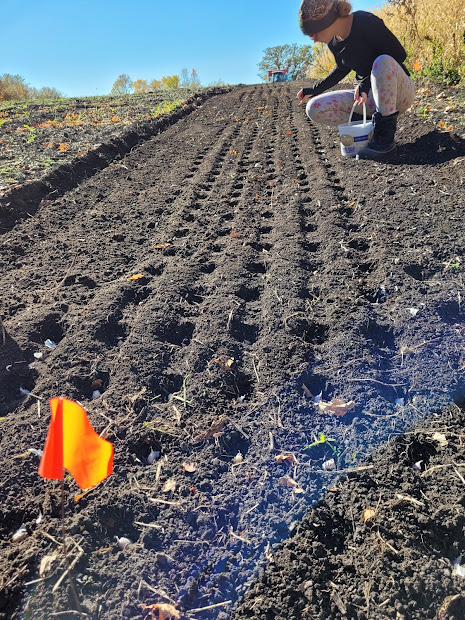
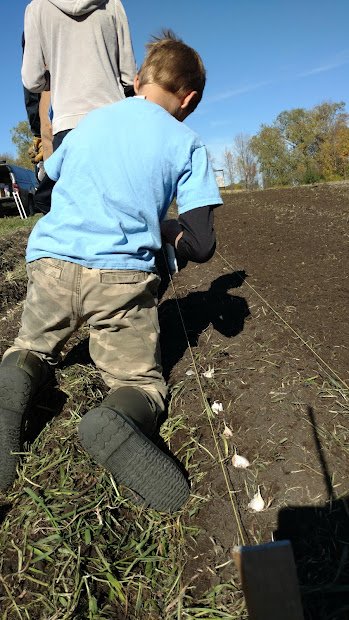
Step 2: Planting
Plant cloves 2–3 inches deep, 6–9 inches apart, with at least 1 foot between rows.
Set each clove pointy side up, root side down — think of it as planting little arrows aiming toward next year’s harvest. Cover with soil and pat gently to firm.
Step 3: Mulch Generously
Once the ground cools or begins to freeze, cover your garlic bed with a thick layer of mulch — straw, leaves, or clean grass clippings all work well.
Mulch helps regulate soil temperature, prevents winter heaving, keeps spring weeds at bay and conserves soil moisture. Leave your mulch on throughout the entire growing season.
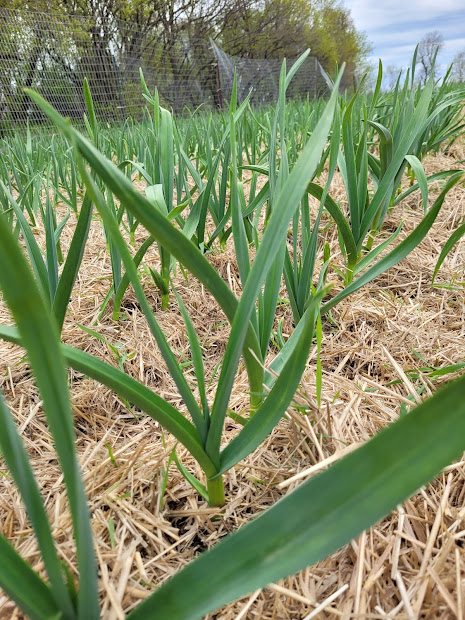
Step 4: Spring Care
As temperatures warm, shoots will poke through the mulch — always a welcome sight.
Keep the bed weed-free, especially early in the season. Garlic doesn’t compete well with weeds, and a little hand-weeding goes a long way.
Water consistently during active growth, especially as bulbs begin to form, but avoid overwatering.
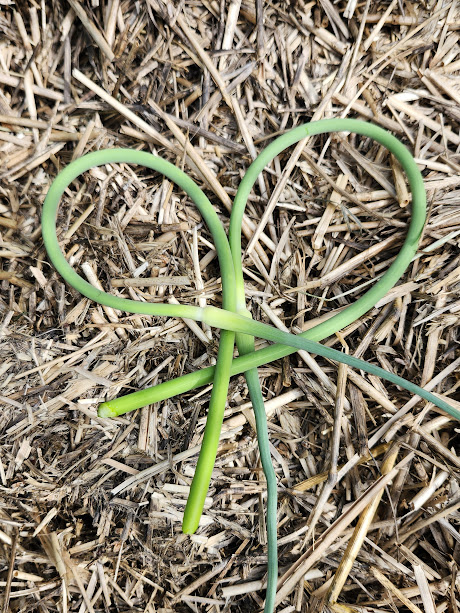
Step 5: The Scape Stage
One of the best parts of growing hardneck garlic is the scapes — those curly flower stalks that appear in early summer.
When they start to loop, snip them off. Removing scapes helps the plant put more energy into growing large bulbs instead of flowers.
And don’t toss them — scapes are tender, garlicky, and delicious. Grill them, make scape pesto, or chop them into eggs and stir-fries.
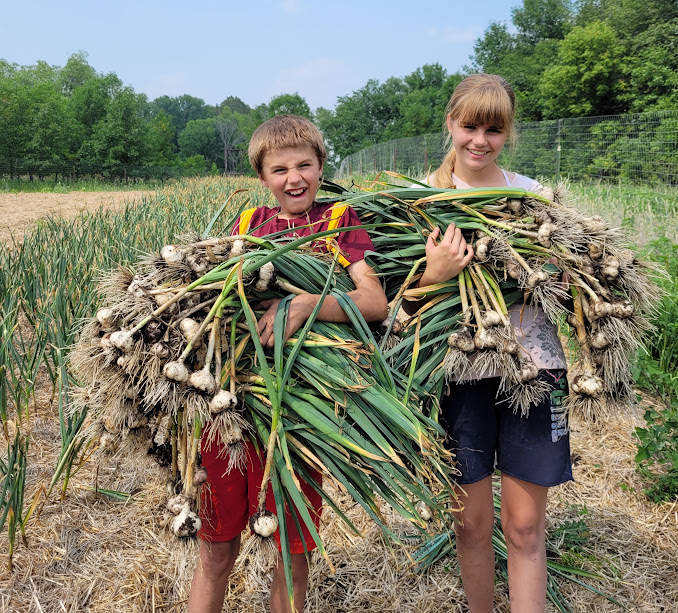
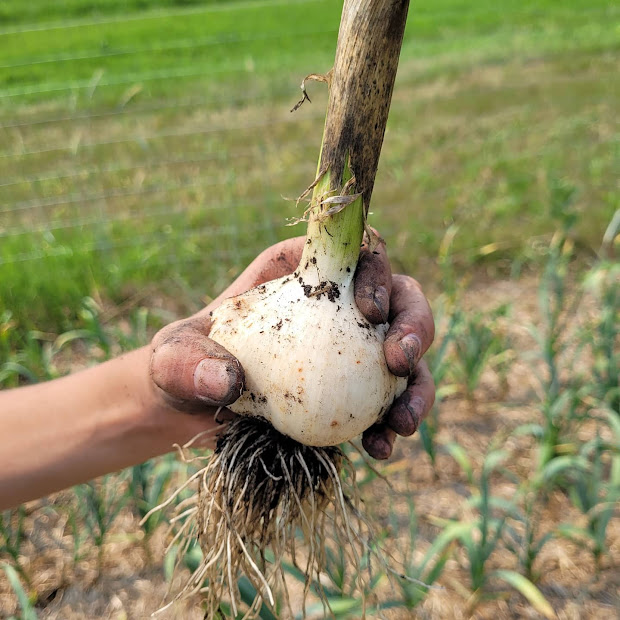
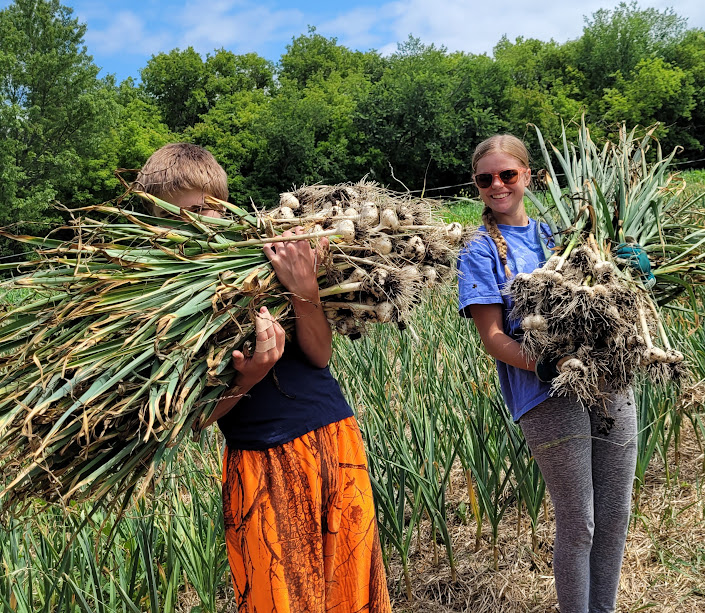
Step 6: Harvest Time
Garlic is ready to harvest about a month after cutting the scapes.
A good rule of thumb: harvest when there are three brown leaves at the bottom and four to five green leaves on top.
Gently lift the bulbs (don’t pull by the stems) and brush off any loose dirt. Skip the washing — it shortens storage life.
Step 7: Cure and Store
Hang or lay your garlic out in a shaded, well-ventilated area for about three weeks to cure.
When the skins are papery and the stems are dry, trim the roots and tops.
Store in a cool, dry place with good airflow — baskets, mesh bags, or open racks work great. Avoid the fridge (it’s too damp).
Properly cured garlic can last for many months, and some varieties will store well into spring.

Rustic Roots Tips for Happy Garlic
-
Mulch matters. It’s your garlic’s best winter coat.
-
Cut those scapes. It’s the secret to big bulbs.
-
Rotate your beds. Don’t plant garlic or onions in the same spot year after year.
Planting garlic is one of our favorite traditions — equal parts patience, planning, and promise. Whether you’re growing a handful of bulbs in your backyard or filling rows on your homestead, hardneck garlic will reward your effort with bold flavor and a little bit of garden magic.